Getting more eyes on your content, videos, and courses can help boost sales and build brand awareness. Using Facebook ads to get more eyes on your stuff is a quick way to get started.
But you keep hearing about this Facebook Pixel and how it’s necessary to be able to see what people are doing on your website (and if they buy something) when they click through an ad.
Maybe you’ve created one in the past, but Facebook has changed the look of Ads Manager so many damn times you can’t find it anymore.
Come friend, I’ll help show you the way to better tracking for your ads.
If you’ve created a Pixel in the past or you need to create one (or you’re not sure), here are the steps to follow:
How to Find Your Facebook Pixel ID
1. Log into Facebook Ads Manager (ads.facebook.com)

2. Click on the 9 dots on the left-hand side of the screen to open the Menu
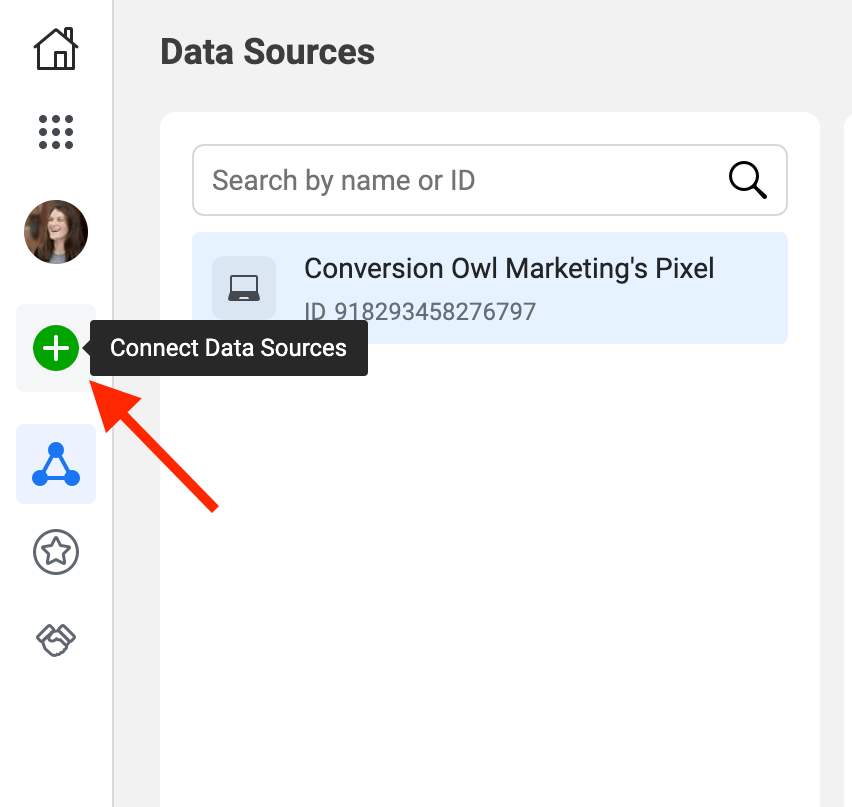
3. Click on “Events Manager” and you’ll end up on a page titled “Data Sources”
4. If you have a Facebook Pixel already created, you’ll see it in the column on the left, and that smaller gray number is your Pixel ID.

–> If you don’t have anything in that column, continue following these steps
How to Create a Facebook Pixel
5. From that page, click on the green “+” sign called “Connect Data Sources” (the name may not show up until you hover over that “+” sign). This is where the process of creating a new pixel comes in.


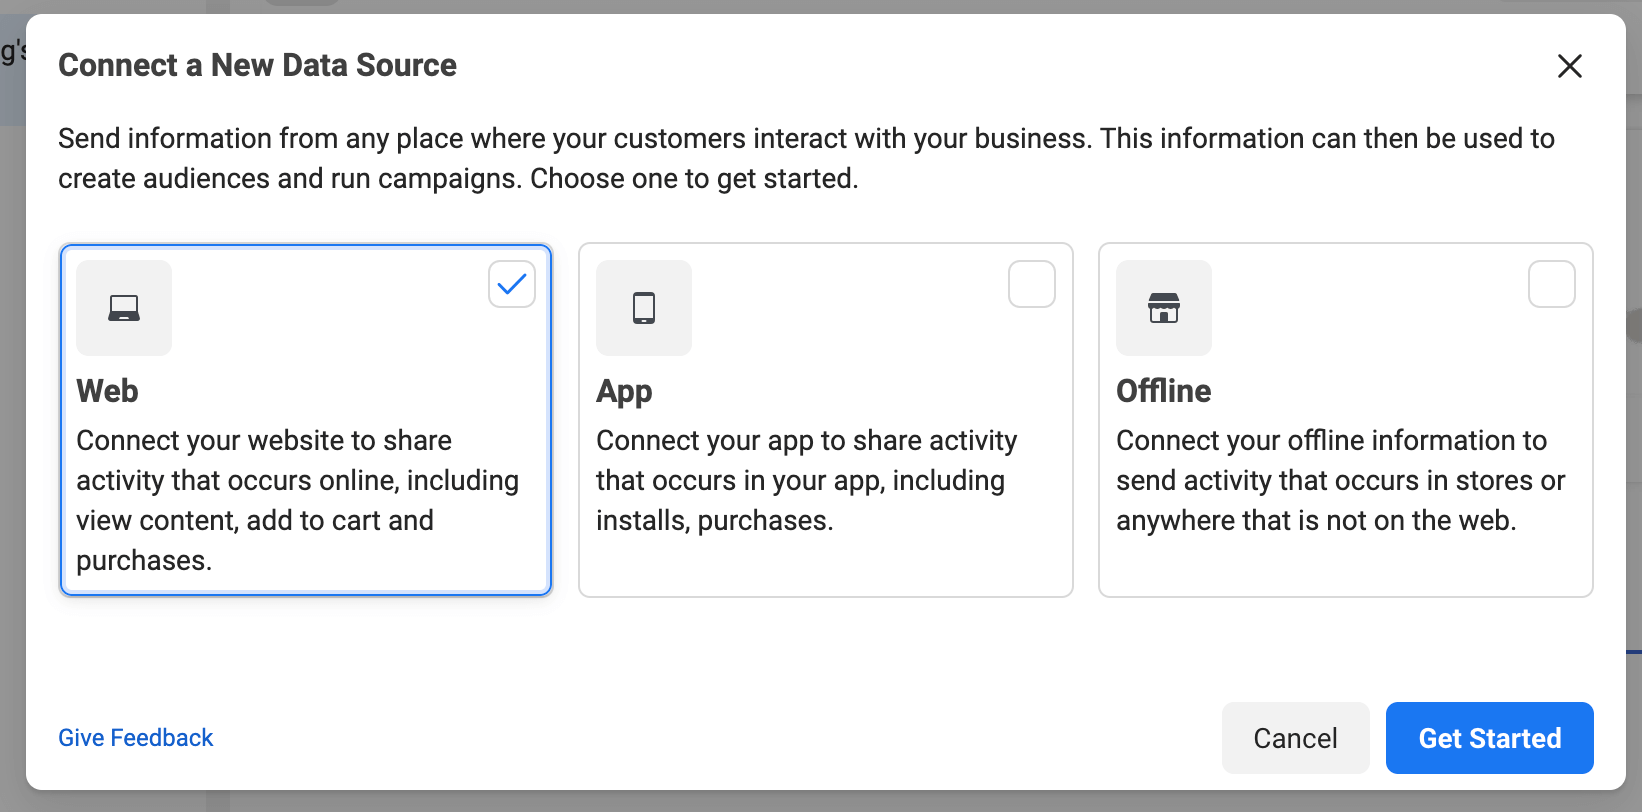
6. You’ll want to select “Web” from the 3 options to create a Facebook Pixel. Click the blue “Get Started” button to continue.

7. On the “Set Up Web Events” screen, select “Facebook Pixel” from the options and click “Connect”
8. On the next screen, you’ll be asked to name your Facebook Pixel. It will then ask for your website, but this always seems to give clients trouble, so I’d leave that blank.

9. The next screen gives you options to install the code manually, or use a partner integration. Even if you don’t have a lot of technical experience, the manual option seems to work better in my opinion.

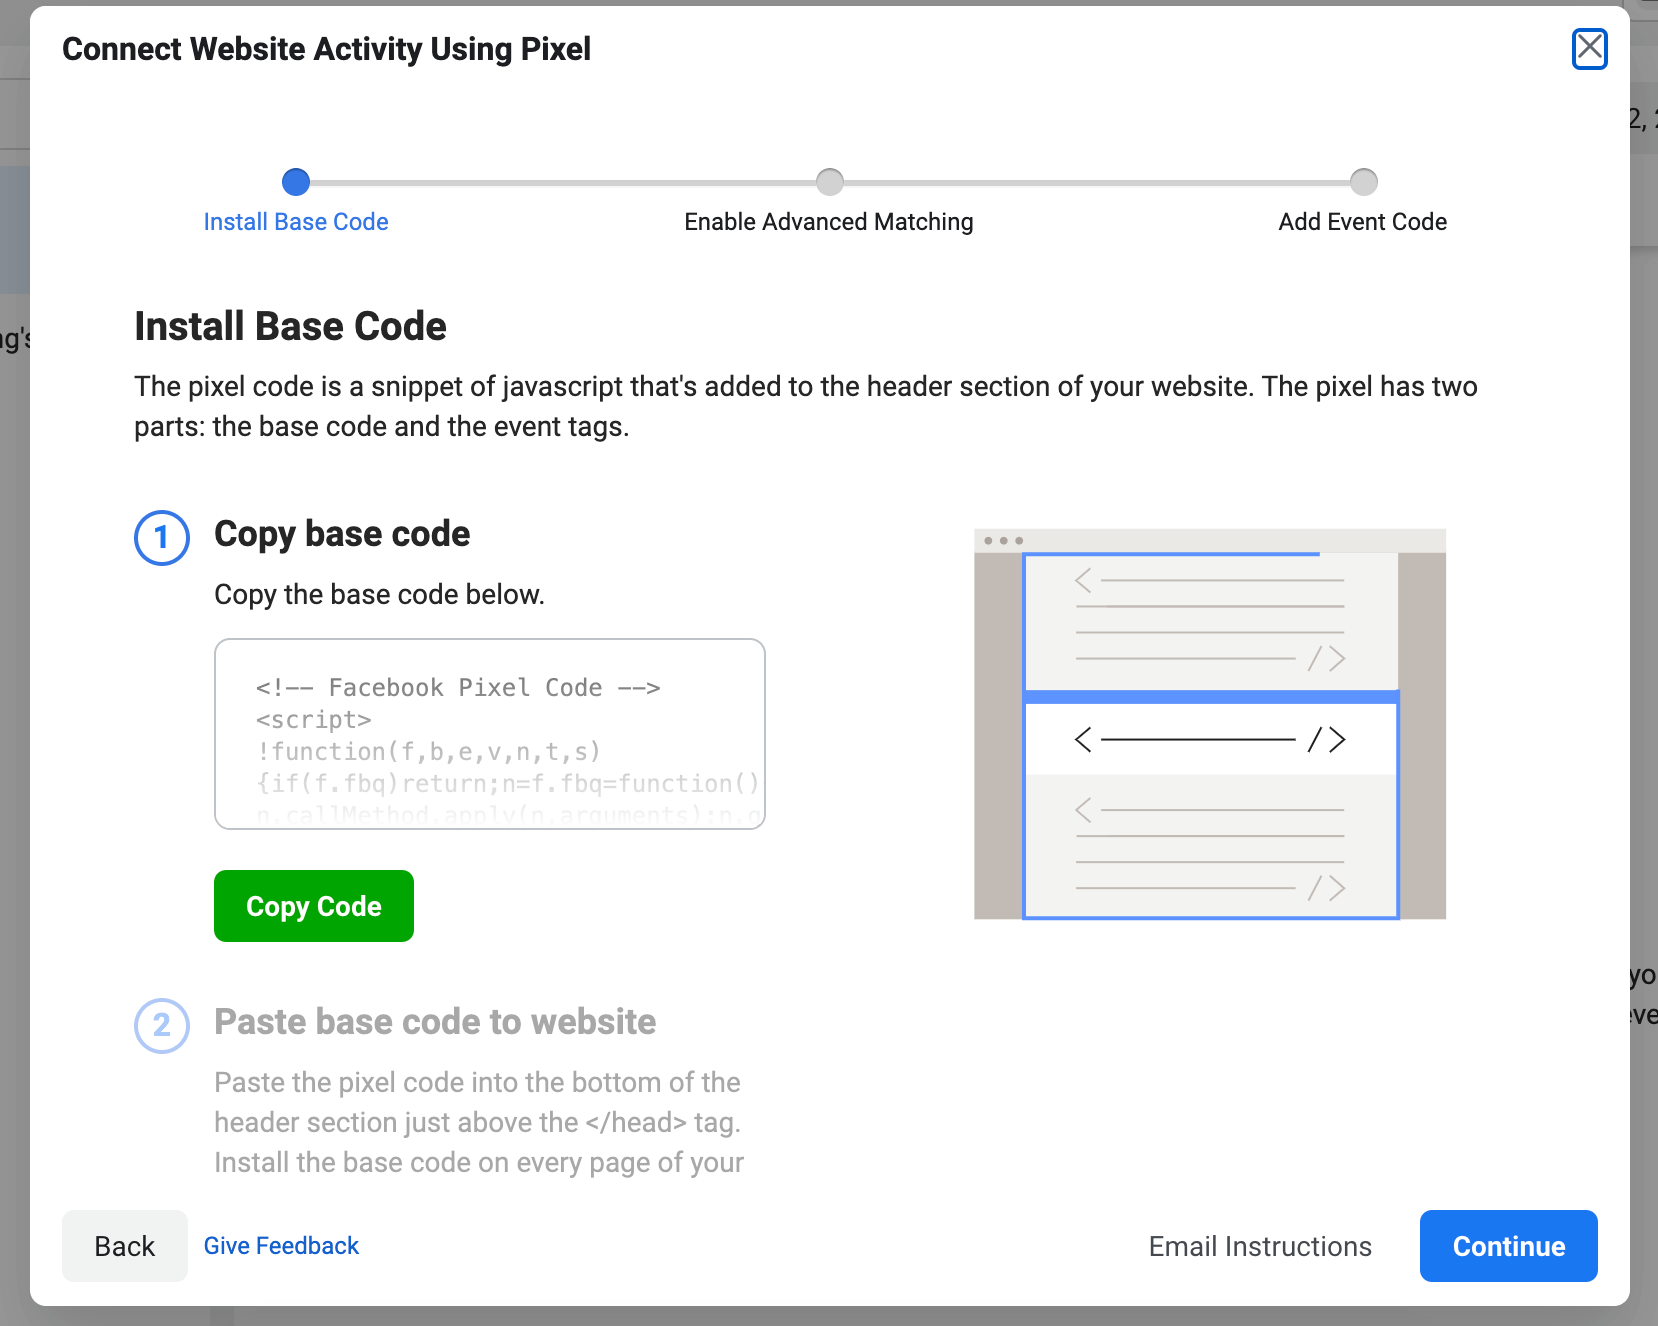
10. You’ll be given the Pixel “base code”, so make sure to copy that.

The Facebook pixel base code will look something like this:
<!-- Facebook Pixel Code -->
<script>
!function(f,b,e,v,n,t,s)
{if(f.fbq)return;n=f.fbq=function(){n.callMethod?
n.callMethod.apply(n,arguments):n.queue.push(arguments)};
if(!f._fbq)f._fbq=n;n.push=n;n.loaded=!0;n.version='2.0';
n.queue=[];t=b.createElement(e);t.async=!0;
t.src=v;s=b.getElementsByTagName(e)[0];
s.parentNode.insertBefore(t,s)}(window, document,'script',
'https://connect.facebook.net/en_US/fbevents.js');
fbq('init', '123456789012345');
fbq('track', 'PageView');
</script>
<noscript><img height="1" width="1" style="display:none"
src="https://www.facebook.com/tr?id=123456789012345&ev=PageView&noscript=1"
/></noscript>
<!-- End Facebook Pixel Code -->
The red numbers will be your specific Pixel ID (and if you lost that, you know where to find it above).
11. You will then be asked if you want to “Enable Advanced Matching”
…to which I would always say yes! Just make sure you have a solid privacy policy and let your readers know that you may be using cookies and pixels to track their data.

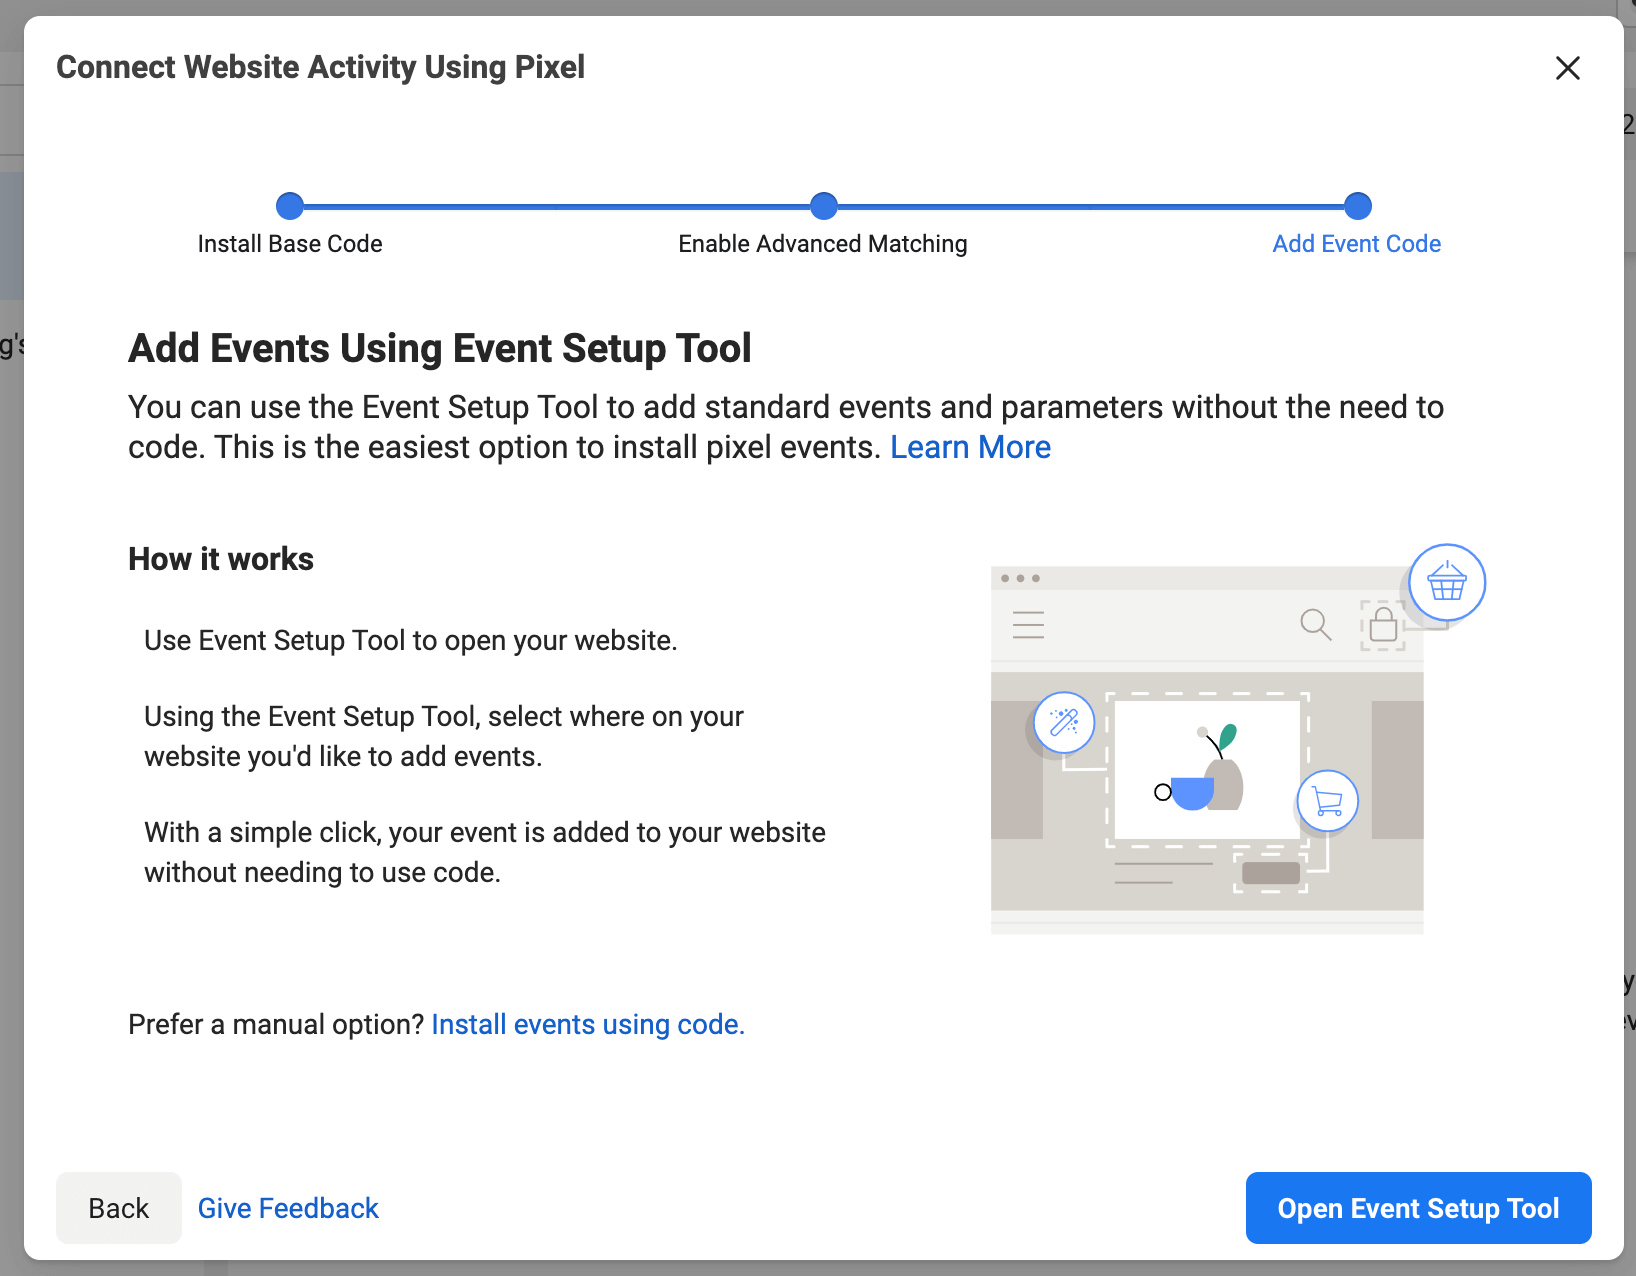
12. Lastly, Facebook will give you the option to use the Event Setup tool to track certain events.
While this can be helpful, you can always come back to this later.

What To Do With Your Facebook Pixel
So now you know where your Facebook Pixel ID is, and/or you’ve created a pixel. Now where does it go?
I’ve created a few tutorials of popular website/course platforms and landing page creators that will help you install the pixel if you need them:
Install Your Pixel on WordPress
Install Your Pixel on LeadPages
Install Your Pixel on Podia

