What Is the Facebook Pixel?
The Facebook Pixel is a small, but powerful piece of code that gives you analytics about your WordPress (or any other) website.
Here are a few things the Facebook Pixel makes possible:
- Showing ads to people who have been to your website, but haven’t taken action (remarketing)
- Measure conversions
- Learn about your website traffic – who they are and how they’re using your website
It’s similar to Google Analytics, but more specifically helps you optimize your Facebook Ads campaigns.
How to Create a Facebook Pixel?
To create a Facebook Pixel, you’ll want to navigate to your Facebook Ads account.
If you haven’t set up a Facebook ads account yet, you can do so here. Once that is created, you can continue on with the instructions below.
Create a Pixel Through the Events Manager
There are a few ways you can create your Facebook Pixel. The first is through the Events Manager.
- To get to the Events Manager, click on the menu icon (9 dots) on the left.
- Next, click the Events Manager shortcut (if you have one), or the Events Manager link under the “Manage Business” heading.

- Click on “Connect a Data Source”
- Select “Web” from the 3 options you’re given
- This will bring up the “Select a Connection Method” box, and you’ll want to select “Facebook Pixel”
Create a Pixel Before Creating a Custom Audience
You can also create a pixel while you’re on the way to creating a custom audience.
1. To get to the Audiences tab, click on the menu icon (9 dots) on the left.
2. Navigate down the the “Advertise” section, and click on Audiences

3. Click the blue button to “Create a Custom Audience”
4. Click “Website” under the “Use Your Sources” heading
5. You will get the box below.

6. Make sure you name the Pixel something you’ll understand, and something you won’t mind other people seeing if you do give access to someone else. You cannot change the name of your Facebook Pixel.
Where Do I Find My Facebook Pixel Code
If you’ve already created a pixel, you can find the code by following these steps:
- Click the menu (9 dots) on the left side
- Then select “Events Manager”
- You will be taken to the Data Sources page
- Click on the pixel you’re looking to install
- Click on “Continue Pixel Setup”
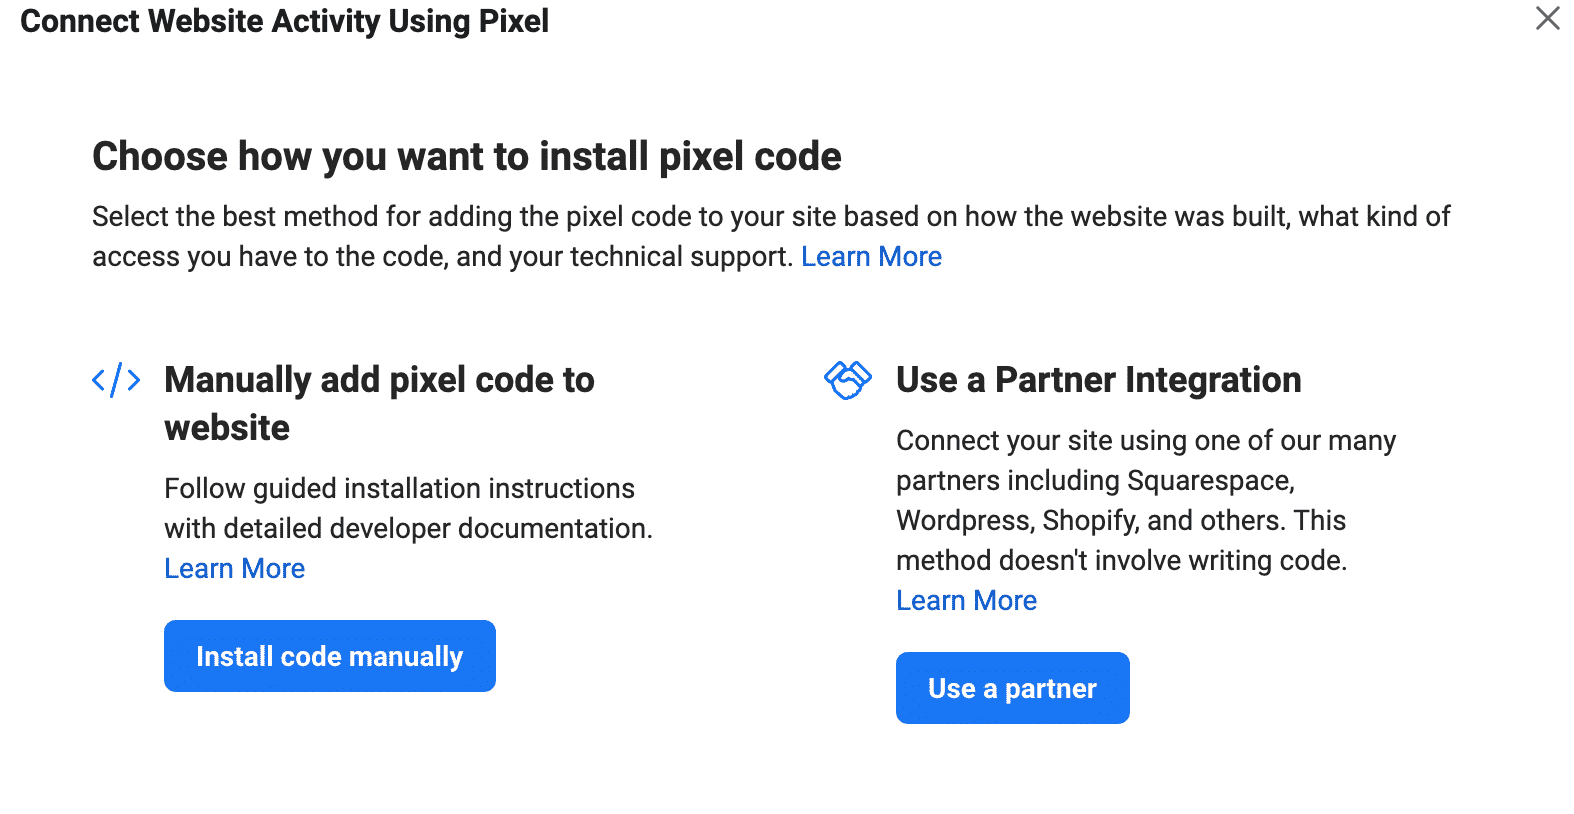
- A box will come up with options for Adding the code manually, or using a partner integration
The next few sections will explain your options for installing the pixel in the different methods.
Where to Find Your Pixel Base Code
Continuing from the instructions directly above:
- Click on the “Install Code Manually” button.

- Copy the “base code” and click continue. If you lose the base code, here is the most recent code.
- Make sure to replace the red text with your Pixel ID:
<!-- Facebook Pixel Code --> <script> !function(f,b,e,v,n,t,s) {if(f.fbq)return;n=f.fbq=function(){n.callMethod? n.callMethod.apply(n,arguments):n.queue.push(arguments)}; if(!f._fbq)f._fbq=n;n.push=n;n.loaded=!0;n.version='2.0' n.queue=[];t=b.createElement(e);t.async=!0; t.src=v;s=b.getElementsByTagName(e)[0]; s.parentNode.insertBefore(t,s)}(window, document,'script', 'https://connect.facebook.net/en_US/fbevents.js'); fbq('init', '1234567890123456'); fbq('track', 'PageView'); </script> <noscript><img height="1" width="1" style="display:non src="https://www.facebook.com/tr?id=1234567890123456&ev=PageView&noscript=1" /></noscript> <!-- End Facebook Pixel Code -->Where to Find Your Pixel ID
If you’ve already installed your pixel, but want to change how it’s installed, or just need your pixel ID here is how to do it:
- Click on the Menu on the left side of your Ads Manager
- Select Events Manager
- Select the pixel from the list (there is likely just one there).
- Click on the “Settings” option under the name of your Pixel

- Click on the Pixel ID in the Details section, and it should automatically be copied for you.
How to add Facebook Pixel to WordPress Manually (Without a Plugin)
WordPress is a great platform that makes creating websites easy to use. So, why would anyone want to manually install this? Well, plugins can slow down your site, so a lot of people prefer to not use plugins.
For those who just need to get the code on the site, and aren’t that concerned about it, here are some free plugins you can use:
You’ll want either the base code, or just the Pixel ID, depending on which plugin you’re using.
- Log into your WordPress website
- Click on Plugins in the left menu
- Select the Add New button
- Search for the name of the plugin, in this case Insert Headers & Footers
- Click the Install button next to the Insert Headers & Footers plugin box
- Then click the same button when it changes to Activate
- Hover over the Settings option in the left menu
- Locate the Insert Headers & Footers in that menu and click on it.
- You will be taken to a page where you can add scripts in the Header, Body, and Footer. The Facebook Pixel is a “script.”
- The Facebook Pixel should be placed in the header, so copy your base code and paste it into the header box

How to Test if a Facebook Pixel is Working
Wouldn’t it be great, if you could just go to your website, and have someone tell you if the Facebook pixel is installed properly?
Enter: the Facebook Pixel Helper chrome extension.
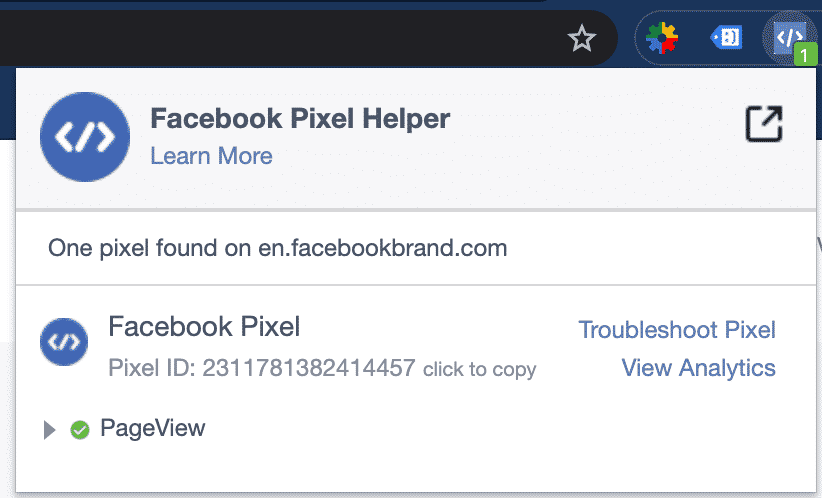
If you’re using Google Chrome, the Pixel Helper is a handy tool you can use that will tell you if the Pixel is installed properly. It will tell you which events are firing on a specific page as well, and if there are any errors you might need to look into.
Here is what it looks like in action:

Once you install the extension, just reload the page you were looking at and it should change from a gray icon to a blue icon.
You can click on the icon and see the Pixel ID, and what events are being tracked.
How To Host Facebook Pixel Locally With WP Rocket
Once you have installed the Facebook Pixel, I definitely recommend getting a plugin called WP Rocket.
Using WP Rocket helps negate that page speed issue I mentioned above when using other plugins. Essentially, you’ll be hosting the pixel “locally” which means there won’t be calls back to the server to get the data as you do with other plugins.
I have clients with really big websites who have removed the Facebook Pixel because of speed concerns. It’s a thing. And WP Rocket can help mitigate that slowness caused by the Pixel.
- Download the WP Rocket plugin and Activate it
- Under Settings on the left-hand side, select WP Rocket
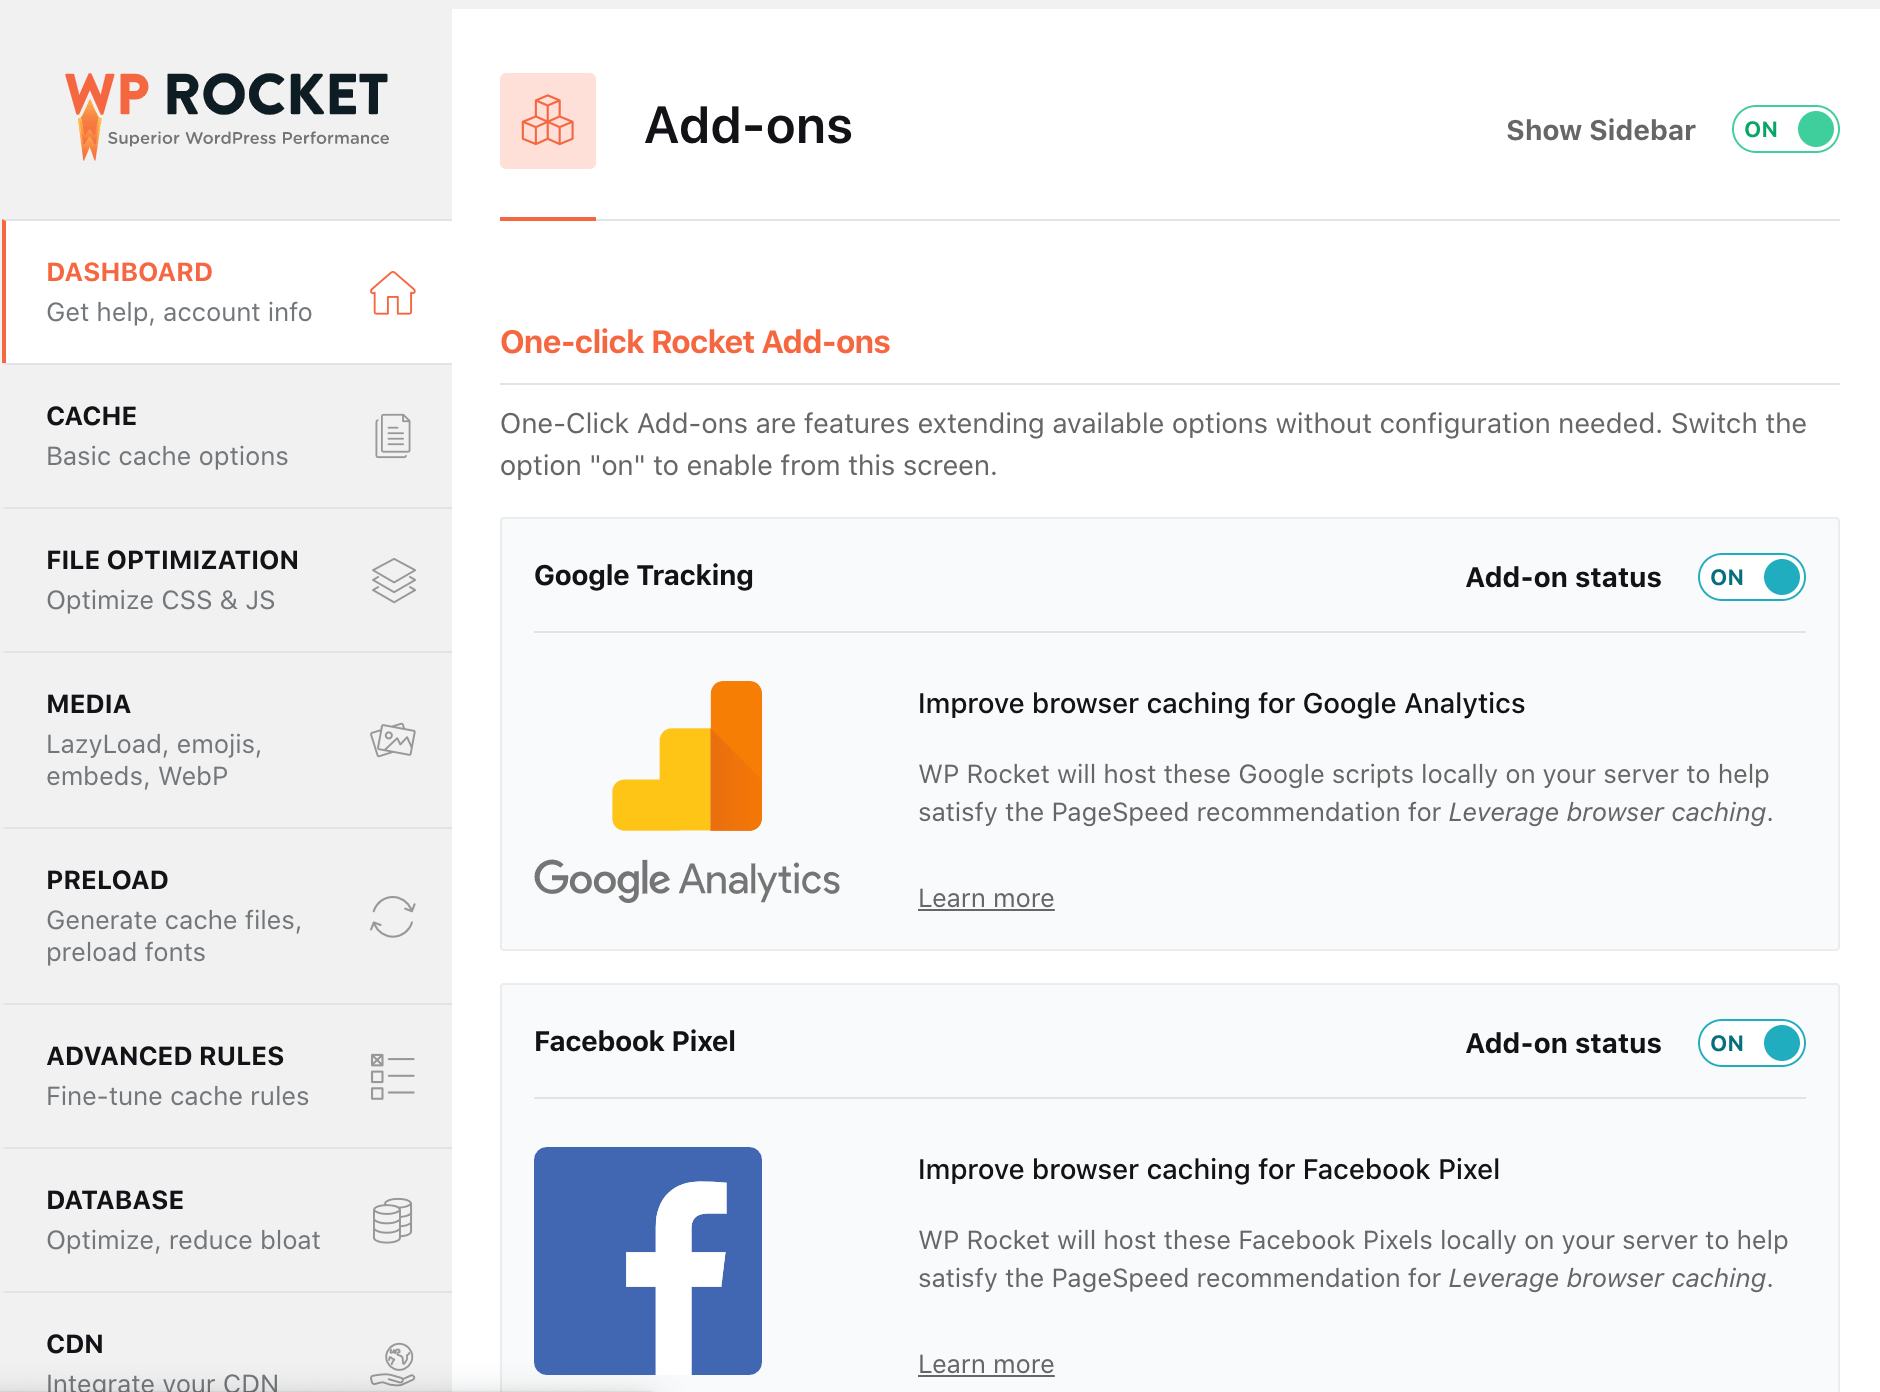
- Navigate to the Add Ons section (towards the bottom)

- Toggle the switch to turn on the Facebook Pixel add-on
- You’re done!
Yes, this is a paid plugin, but helping speed up the Facebook Pixel is only one of about 100 other things it does to speed up your website.
All of the tutorials on how to do this were showing you with the “old” version of Facebook. They made it more complicated this time around, so I hope this was helpful!
If you also want to install the Pixel on your landing pages, here are instructions on how to add the Facebook Pixel to LeadPages.

