
")
What Is Facebook Pixel?
The Facebook Pixel is a small, but powerful piece of code that gives you analytics about your Leadpages (or any other) page.
Here are a few things the Facebook Pixel makes possible:
- Remarketing – showing ads to people who have visited your website, but haven’t taken action yet (remarketing)
- Track conversions and people who signed up for your offers
- Understand your website traffic better – who the visitors are and what they’re doing on your website
It’s similar to Google Analytics, but more specifically helps you optimize your Facebook Ads campaigns.
How to Create a Facebook Pixel?
To create a Facebook Pixel, you’ll want to navigate to your Facebook Ads account.
If you haven’t set up a Facebook ads account yet, you can do so here. Once that is created, you can continue with the instructions below.
Create a Pixel Through the Events Manager
There are a few ways you can create your Facebook Pixel. The first is through the Events Manager.
- To get to the Events Manager, click on the menu icon (9 dots) on the left.
- Next, click the Events Manager shortcut (if you have one), or the Events Manager link under the “Manage Business” heading.

- Click on “Connect a Data Source”
- Select “Web” from the 3 options you’re given
- This will bring up the “Select a Connection Method” box, and you’ll want to select “Facebook Pixel”
Create a Pixel Before Creating a Custom Audience
You can also create a pixel while you’re on the way to creating a custom audience.
- To get to the Audiences tab, click on the menu icon (9 dots) on the left.
- Navigate down the the “Advertise” section, and click on Audiences

- Click the blue button to “Create a Custom Audience”
- Click “Website” under the “Use Your Sources” heading
- You will get the box below.

- Make sure you name the Pixel something you’ll understand, and something you won’t mind other people seeing if you do give access to someone else. You cannot change the name of your Facebook Pixel.
Where Do I Find My Facebook Pixel Code
You can also use this post to find your Facebook Pixel ID.
If you’ve already created a pixel, you can find the code by following these steps:
- Click the menu (9 dots) on the left side
- Then select “Events Manager”
- You will be taken to the Data Sources page
- Click on the pixel you’re looking to install
- Click on “Continue Pixel Setup”
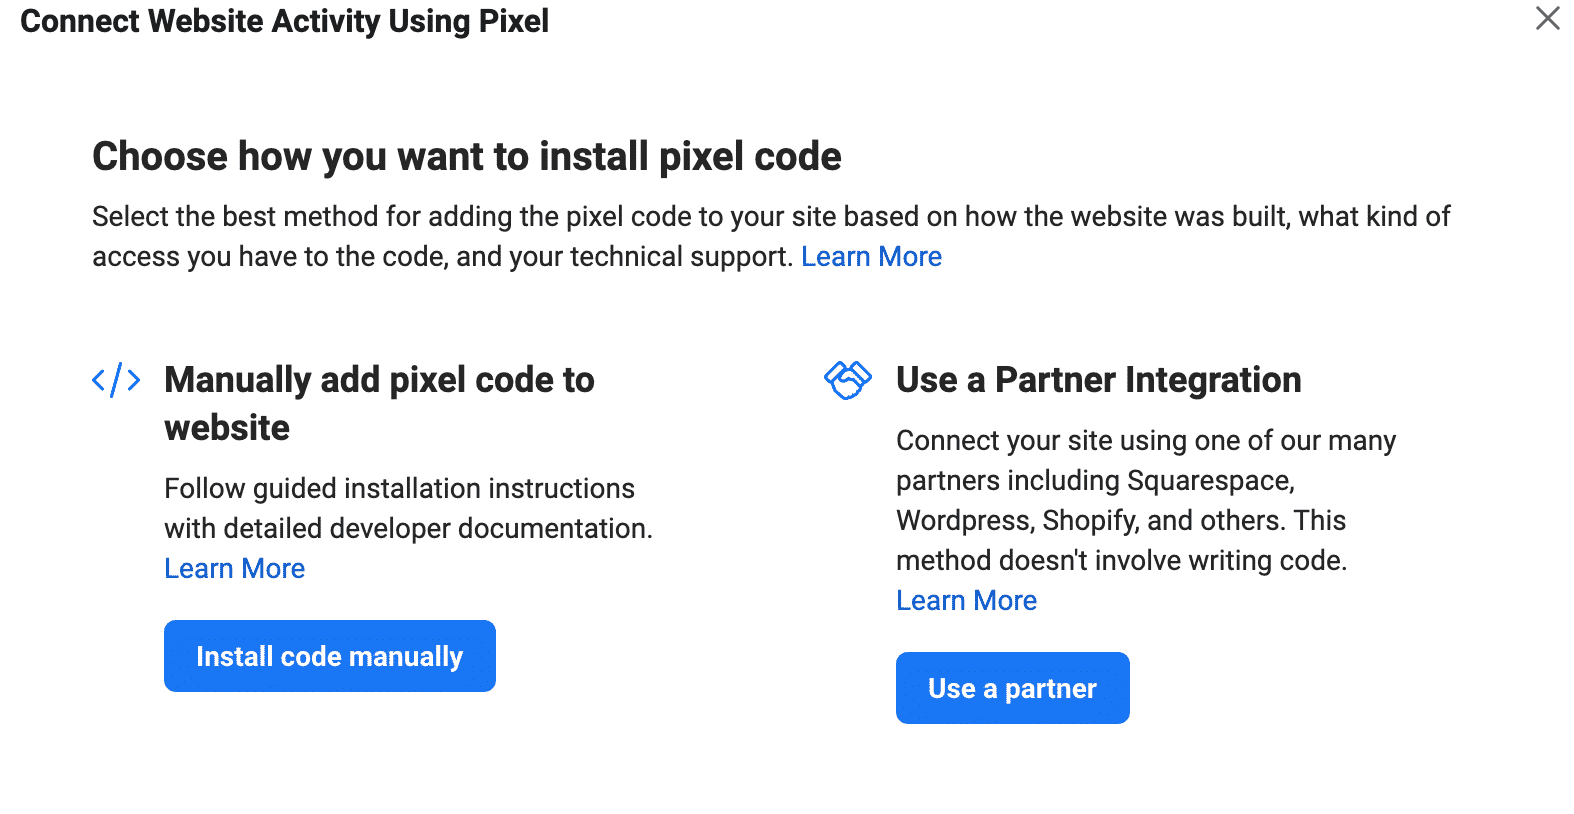
- A box will come up with options for Adding the code manually or using a partner integration
The next few sections will explain your options for installing the pixel in the different methods.
Where to Find Your Pixel Base Code
Continuing from the instructions directly above:
- Click on the “Install Code Manually” button.
- Copy the “base code” and click continue. If you lose the base code, here is the most recent code.
- Make sure to replace the red text with your Pixel ID:
<!-- Facebook Pixel Code -->
<script>
!function(f,b,e,v,n,t,s)
{if(f.fbq)return;n=f.fbq=function(){n.callMethod?
n.callMethod.apply(n,arguments):n.queue.push(arguments)};
if(!f._fbq)f._fbq=n;n.push=n;n.loaded=!0;n.version='2.0'
n.queue=[];t=b.createElement(e);t.async=!0;
t.src=v;s=b.getElementsByTagName(e)[0];
s.parentNode.insertBefore(t,s)}(window, document,'script',
'https://connect.facebook.net/en_US/fbevents.js');
fbq('init', '1234567890123456');
fbq('track', 'PageView');
</script>

<noscript><img height="1" width="1" style="display:non
src="https://www.facebook.com/tr?id=1234567890123456&ev=PageView&noscript=1"
/></noscript>

<!-- End Facebook Pixel Code -->
Where to Find Your Pixel ID
If you’ve already installed your pixel, but want to change how it’s installed, or just need your pixel ID here is how to do it:
- Click on the Menu on the left side of your Ads Manager
- Select Events Manager
- Select the pixel from the list (there is likely just one there).
- Click on the “Settings” option under the name of your Pixel

- Click on the Pixel ID in the Details section, and it should automatically be copied for you.
LeadPages
LeadPages is a landing page builder that makes creating pages and split tests easy to build. It can be a little confusing to add this code to your pages, so created a tutorial for you.
You’ll need the base code with your Pixel ID to add this to LeadPages, and of course, a LeadPages account.
- Log into your LeadPages account
- Select the page you want to add your Facebook Pixel to
- Click Settings on the left-hand side

- Navigate to the “Head Section Tracking Code” section.
- You’ll enter your Facebook Pixel code into this box.
- Click the blue “Save” button at the top of the menu.
- Click the blue “Update” button in the top right-hand corner of the page
