While a lot of businesses have campaigns they’ve been running for a long time and just iterating on, sometimes you want to test out a new campaign for a new service offering or promotion you’re running.
That’s where start and end dates come in really handy with Google Ads.
You can schedule the campaign to start at some point in the future, and also choose the date you want the campaign to turn off.
Don’t be like these guys
This is one of my favorite examples of an ad campaign that really could have benefited from using campaign end dates.
A local buffalo wing place in Philadelphia was running ads around the Super Bowl. It was a great idea to show up in front of people who are probably looking to get wings for their Super Bowl party. I’m sure it droves sales.
The problem was, they had this ad running for months after the Super Bowl ended.

Being able to set a time limit for Google Ads campaigns is really helpful in these cases.
How to set a time limit on Google Ads
There are 3 ways you can set a campaign end date within Google Ads.
1. During the campaign setup process
You can set your campaign start and end dates when you’re first building out your campaigns.
These settings are in the advanced section, so you’ll need to click through a bit to find them.
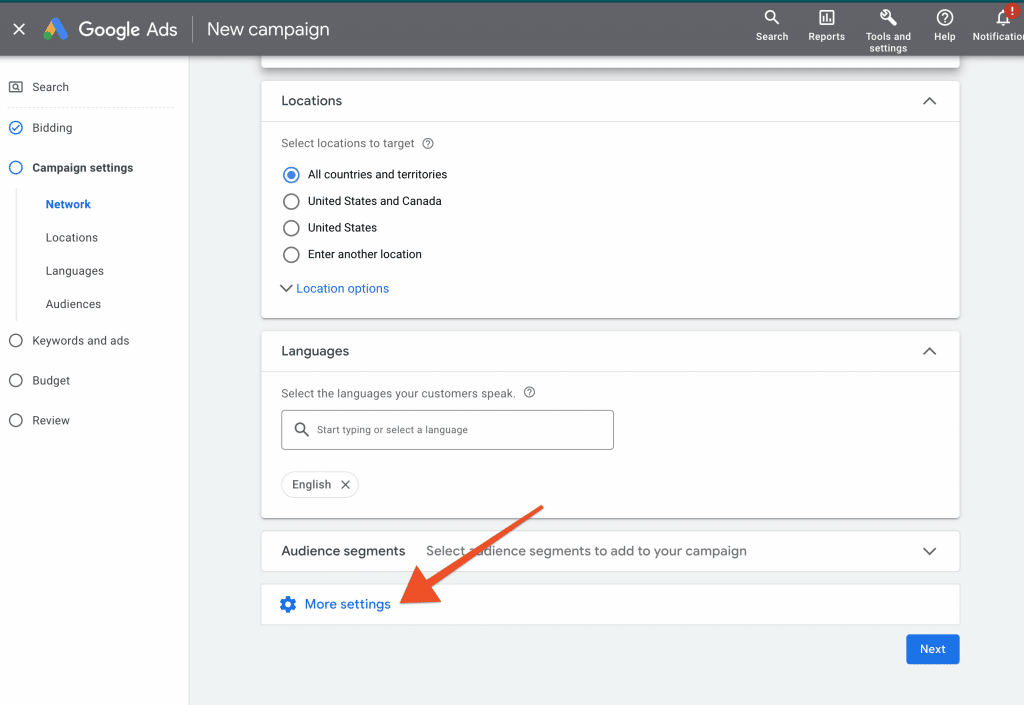
Once you’ve chosen your campaign objectives and bidding strategies, you’ll get to a section about locations and languages you want to run the campaigns in.
At the bottom of this screen there is a “more settings” area, it looks like this:

Once you click on that, you’ll see an area where you can choose your campaign start and end dates.

From that area you’ll be able to select when you want your campaign to start running. If you want it to start immediately, you can leave it as is and just set the end date.
Vice versa, if you want the campaign to start in a week, but never end, you can set that as well by leaving the end date as “None”.
2. From the Campaign Settings screen if your campaign has already been created
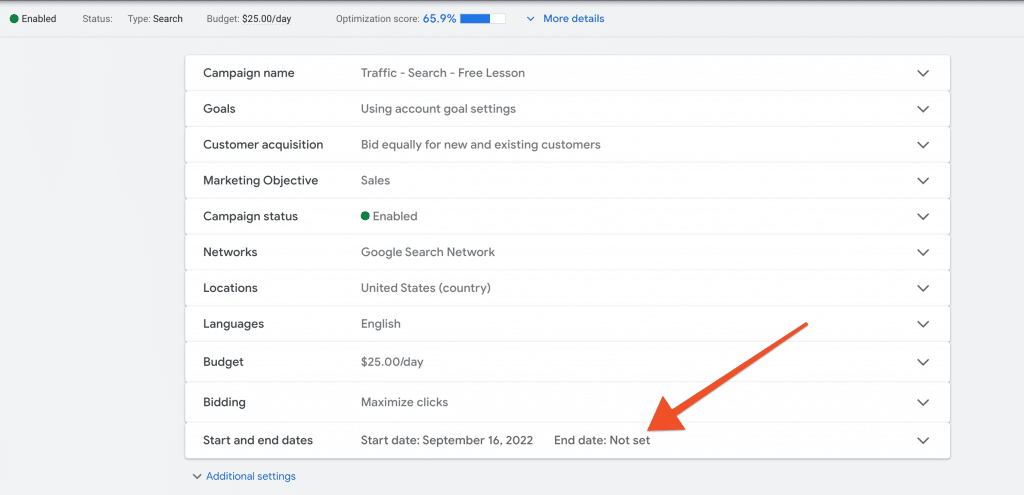
If you have already built out your Google Ads campaign and want to edit the campaign end date, you can do so from the campaign settings screen.
You’ll want to make sure you’re in the Campaign Settings, and not the Ad Group settings.
Note: If you’re in the wrong section, you’ll see about half of the options listed in the screenshot below

You can choose the Start and end dates section and make changes there.
3. Setup an automated rule
This method is a little more involved, but if you have multiple campaigns you want to set end dates for, or want to set a specific time for the campaign to turn off, you can do that from here.
You can create a rule to turn the campaign on or off at various times or dates.
- From the Tools and settings menu at the top, click on “Rules” under the Bulk Actions heading.

- Click on the “+” sign to add a rule.

- Click on “Campaign Rules” from the drop-down menu.

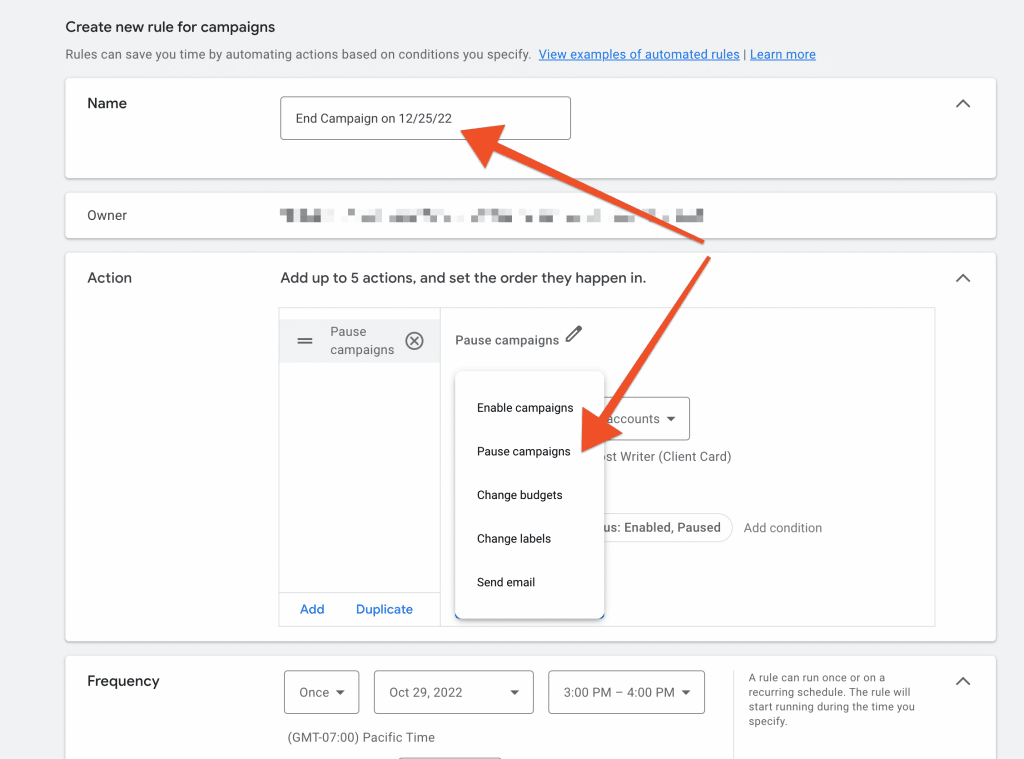
- Give your rule a name, like “End Campaign on 12/25/22“
- Choose “Pause campaigns” as the action, and set the Frequency to either “Once” or if this is a recurring thing, set it up accordingly.
- Select whether you want an email confirmation or not, and then click “Save Rule“.
That’s it, your campaign will now has a time limit and will turn off at the specific time and you’ll get an email letting you know it happened. Pretty cool!
If you want to control the full schedule and specific times and days your ads run, you can use an Ad Schedule. I show you how to set up a full Ad Schedule here.

